
Harold Hall
Manufacture.
Body (2).
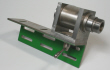
Cut a piece of 50 mm square, a little over over 32mm to allow for machining on both sides. Whilst it is not critical, it is desirable that the sides of the body are at right angles to the two faces. If therefore, you have hand sawn the piece, or worked with a poorly set up band saw, as I did, machine one face square using the set up shown in Photo 3.
Add a fence to an angle plate setting it square to the base prior to being placed onto the milling machine table. Set the face of the angle plate accurately parallel with the X axis, left/right, being necessary for a later operation. With the material against the fence, the fence provided accuracy to two opposite faces and the angle plate the other two. The photograph shows that only one clamp is being used, not ideal, but acceptable in this case as the machining forces are towards the fence and only light.
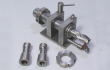
With the one face true to the sides the Body can be transferred to the four jaw chuck with the face just machined against the chucks body and set to run reasonably true, precision not being necessary. Now machine the available face, still leaving the part over 32mm also drilling centrally for taking the top slide stud, Photo 4. Turn over and machine the second face to achieve the 32mm dimension. A turned face being more pleasing than the milled face produced initially. Leave the four jaw on the lathe.
Using the angle plate, with fence, still on the milling machine, produce the 8mm wide slot, 2mm deep, in the Body, Photo 5. Do ensure that Body is fully against the fence on the angle plate.
Tool Holders (7)
Next, depending on the number of Tool Holders being made and the traverse available on your milling machine, cut some lengths of 25mm square steel. For me, I cut three lengths each sufficient to make four holders.
Set two fixed jaws on the rear slot of the milling machine table with their faces perfectly in line and parallel with the X axis and place the first piece against these securing it with some form of low profile clamps, Photo 6. The Photograph shows I used one of my five types of low profile clamps, The clamp being used has an advantage over the others in that it can clamp at 90 degrees to the table's tee slot.
Metalworking
Workshop Projects


3
4
5
6